This article will discuss the inlay techniques, the materials used, as well as how to install and maintain it. With a rotary handpiece and 1/16" upcut spiral bits, we'll learn how to make mortise and inlay. Keep reading for more information. Then, try it yourself! You'll probably enjoy this easy and rewarding project. You can't turn a woodturning project without inlays!
Techniques
Inlay techniques can play a significant role in a woodworking project. They can add interest to the finished piece, enhancing its aesthetics. There are many ways to make a beautiful inlay. Each method has its advantages. This article will provide a guideline to the various methods. Continue reading for more information! You will need to prepare the wood. Use a paper towel or damp rag to clean the wood. To get rid dirt and residue from the wood, you can use mild dish soap. Chemicals can damage the wood so be cautious when using them. You might also consider hand tools for removing wood.
Inlay techniques can be applied to other materials. A few examples include stone, metal, and wood. When applied properly, inlaid pieces can add a beautiful contrast image to the piece. There are many types of inlay tools, such as knives, jigs and fixtures that hold the inlayed pieces in their place. Inlaying can be done before or after turning the wood. After turning the piece of wood, you can add inlay items to the top or the bottom.
Materials
Using a wide variety of inlay materials to cover the surface of your finished object will give your piece more visual appeal. Inlay materials are able to be used to cover many different types of recesses. In some cases, you can even use inlay materials to cover screw heads or brad nail locations. These steps will help you create stunning inlays.
Inlaying an inlay requires that you choose the right material. This is why some materials are better suited than others. Resin inlay is more comfortable for some people because it doesn’t require the cutting of delicate pieces and fills in any voids created by mortises. There are many colors available, which can make resin look magical. These are some ways to use resin inlay material.
Installation
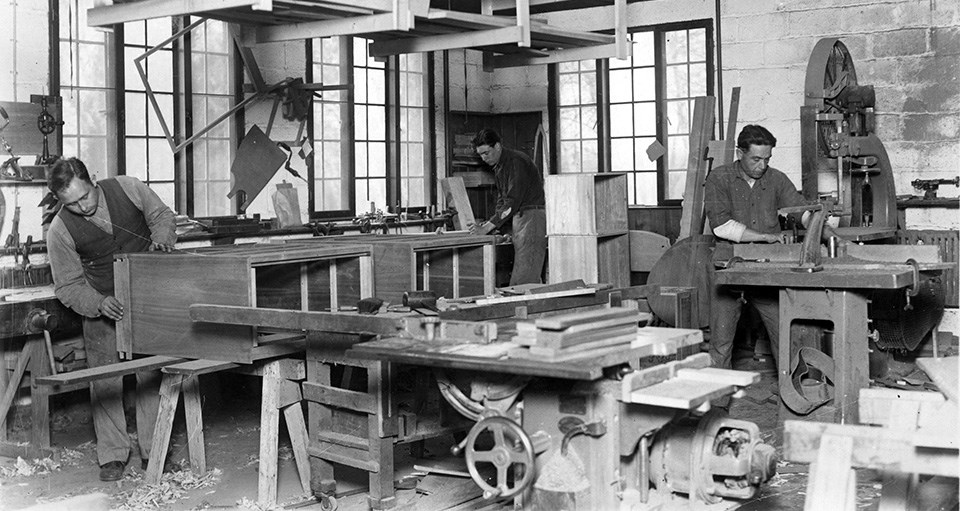
Inlay work is a decorative element that is applied to turned wooden objects. Ron Hampton gives detailed instructions on how to make woodturning inlays. He shows the process of installing inlays on bowls, tops, and bottoms. He discusses safety guidelines as well as the importance of precision during the process. This technique adds an extra touch to the wood turns. Inlay bandings are available from various suppliers, such as Woodcraft.
Preparing the base of the wood for woodturning inlay is essential. A plunge router is the best choice for the best results. Attach the template guide to your router's base. Push the bushing into the appropriate position around your guide collar. Make sure that the base is flat after placing the inlay. Installing the inlay with its angled edges will be much easier. A router that has a bit slightly larger in size than the mortise will make it easier to install the Inlay.
Maintenance
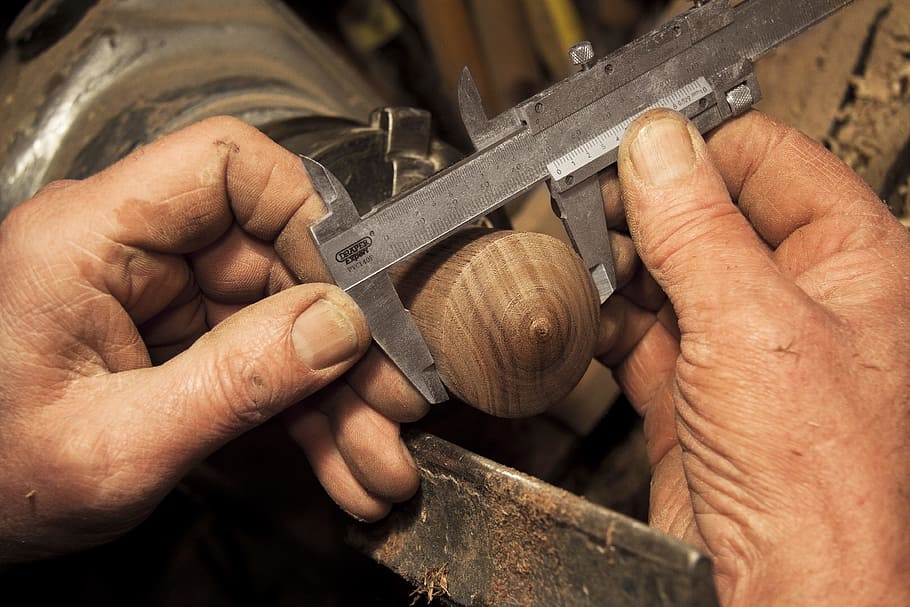
Woodturning inlay requires only a few simple steps. Clean your inlay thoroughly before you place it in your woodturning job. This is especially important for those using CA glue in stone inlay. You can also use a 3/16 inch allen wrench to determine the depth of your inlay if you have very limited space. You can sand your inlay to 120 grit to avoid scratching it.
FAQ
How do I organize my shop?
A designated place to store your tools is the first step towards keeping your workshop clean. You want your tools to stay clean and free from debris and dust. Use pegboard hooks to hang tools and accessories.
Do you have any advice on how to start a woodworking business.
It takes a lot of effort to start a woodworking business. However, if you are passionate about your hobby you will be willing to put in the effort. Plus, you'll probably enjoy the challenge of running your own business.
When you are launching a new venture, it is important to be aware of the possibility that you will encounter unexpected difficulties. You might run out money, or you may have to borrow unexpectedly. You might find customers not willing to pay the amount you expected. Preparedness is key to survival in such situations.
One good tip is to set up a separate bank account specifically for your business. You will always know how much money you have coming in.
How do I determine what kind of wood my project is made from?
Always inspect the label when buying wood. The label should detail the wood species, its moisture content and whether it has been treated or not.
Do I need to be a genius to succeed in woodworking?
No. Woodworking is not rocket science. It is possible to learn basic tools and techniques that will allow you to create beautiful art.
Statistics
- If your lumber isn't as dry as you would like when you purchase it (over 22% in Glen Huey's opinion…probably over 10-15% in my opinion), then it's a good idea to let it acclimate to your workshop for a couple of weeks. (woodandshop.com)
- Woodworkers on the lower end of that spectrum, the bottom 10% to be exact, make roughly $24,000 a year, while the top 10% makes $108,000. (zippia.com)
- The U.S. Bureau of Labor Statistics (BLS) estimates that the number of jobs for woodworkers will decline by 4% between 2019 and 2029. (indeed.com)
- The best-paid 10 percent make $76,000, while the lowest-paid 10 percent make $34,000. (zippia.com)
External Links
How To
How to join wood without using nails
Woodworking is a hobby that many people enjoy doing. Woodworking can be a fun hobby because you can work with your hands to make useful objects from wood. You may need to join two pieces without the use of nails. This article will teach you how to do this to keep your woodwork projects looking great.
First, remove any sharp edges from the wood pieces before you join them. Do not leave any sharp corners as they could cause problems down in the future. Once you've done this, you're ready to start gluing your boards together.
If you are working on hardwood, you should only use glue on one side. You should glue both sides if you are working with softwoods such as pine and cedar. After applying the glue, press the boards firmly until they are completely stuck together. Be sure to let the glue dry before you move on to the next step.
After you glue your boards together, drill holes at the joints where screws will be inserted. These holes will differ depending on the type and size of screw you are using. If you are going to use a half-inch wood screw, you will need to drill at least 3/4 inch deep.
Once you've drilled your holes, you'll want to drive the screws through the joint and into the backside of the board. You should be careful not to touch the board's front surface. This could cause damage. Be careful not to drive the screws too hard at the ends. This will prevent the wood from splitting.
After your project is completed, you will need to protect it from the weather. You can seal the furniture pieces or cover the top. It doesn't matter what method you use, you want something that will last many years. Some examples include oil-based varnishes, polyurethane, shellac, lacquer, etc.
These products can usually be found at any home improvement store. Just make sure that you buy the right kind for the job. Remember that some finishes can be toxic, so you should not use them indoors. So, always wear protective gear when handling them.