
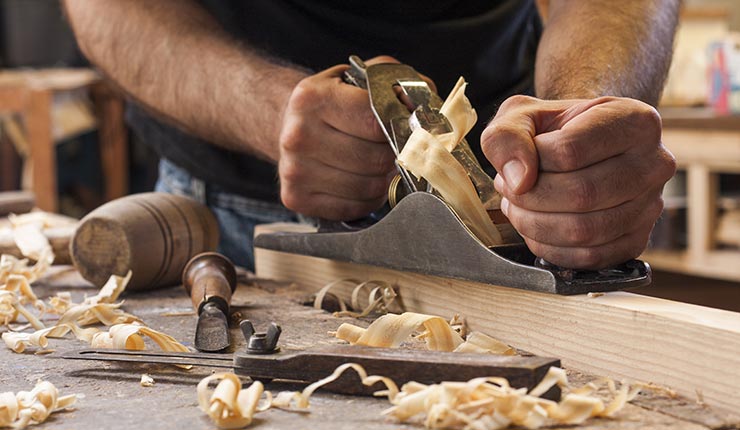
Practice on some basic hand-held planes to learn how to use handplanes. Smoothing planes would be a good example. Smoothing planes are used to make curves and edges. Combination planes are also a popular choice for a woodworking project. Also available are a low-angle adjustable block plane with a narrow mouth and a jack plan. Learn more about handplanes by reading on!
Smoothing plane
A good hand or table plane can be used for most woodworking jobs. But some jobs are best suited for a smoothing plane. A smooth, well-tuned smoothing tool will create a smooth, shiny surface. To use this type of plane effectively, you should have a solid body position and a steady downward pressure. There are many different types of smoothing boards, but for beginners you can use a metal one.
Combination plane
The Lee Valley Veritas Combination Plane is an updated version of Stanley #45, which was built between 1884-62. The hand plane had seven functions, including beading and plowing groove, creating dado, rebate housing, and even sash plane. The Veritas will accept blades of both planes and makes a fine alternative.
Jack plane
You will find the easiest ways to use a basic jack plane helpful, no matter how experienced you are in woodworking. Two irons are used in a jackplan. The large iron is used for smoothing out thick, narrow pieces. Each iron has its own unique shape. One iron is used to remove the thickest pieces of wood. Another iron smoothens the surface and is used loosening edges.
Block plane for low-angle, adjustable-mouth blocks
Low-angle adjustable-mouth block planes are similar to the #60 Stanley, but do not have fully adjustable mouths. It is supplied with a turned rosewood front knob. The #60, unlike the #9 1/4 model's adjustable mouth, is not very valuable. It is very rare to find a Stanley block plane that lasts a lifetime.
Grooving plane
A grooving plan, also known by the name "plough plane", is a woodworking instrument used to cut grooves. It can be used to cut very narrow irons (some are just 3mm (1/8") long) and is typically used to fit drawer bottoms and cabinet backs, as well frame and panel construction. It is also used for cutting grooves in housing joints like the one at the shelf's end. The special grooving plane is used to create tongues and grooves in large furniture pieces' sides.
FAQ
What tools work best for me?
When shopping for tools, it helps to think about your needs and preferences. What do you prefer: metal or plastic handles? What size nails and screws do you usually use? Would you rather use hand tools than power tools?
Does it take a genius to make woodworking work?
No. Woodworking is not rocket science. To create stunning works of art, anyone can learn to use basic power tools.
What is the average time it takes to finish furniture?
It all depends upon the size of your piece of furniture. You can finish smaller projects, such as boxes or picture frames, in one day. Larger projects, like desks or dining tables require several days. It takes time for the wood to be stained and sealed properly.
What material would you recommend to start learning woodworking?
Start with softwood like pine, poplar and ash. Once you feel comfortable with these two, move on to hardwood.
How can you calculate the woodworking price?
It is crucial to keep project costs as low-cost as possible. It is important to ensure that you are getting the best materials prices. You should also consider other factors that could impact the cost of your project, such as experience, skill level, time, and money. You can find an estimate of the cost of different woodwork projects in our guide to common DIY tasks.
What is the difference in a hobbyist and professional woodworker?
Hobbyists like making things with wood. Professionals focus more on quality. Hobbyists often take pride in the creations they make and often share them to family and friends. Professionals will spend hours looking at designs before they start to build a project. They will pay attention to every detail, from selecting the best materials to finishing the project perfectly.
Statistics
- The best-paid 10 percent make $76,000, while the lowest-paid 10 percent make $34,000. (zippia.com)
- Average lumber prices rose about 600 percent between April 2020 and May 2021. (familyhandyman.com)
- In 2014, there were just over 237,000 jobs for all woodworkers, with other wood product manufacturing employing 23 percent; wood kitchen cabinets and countertop manufacturing employing 21 percent. (theartcareerproject.com)
- The U.S. Bureau of Labor Statistics (BLS) estimates that the number of jobs for woodworkers will decline by 4% between 2019 and 2029. (indeed.com)
External Links
How To
How to join hardwood without using nails
Woodworking is an enjoyable hobby. Woodworking is a relaxing hobby that allows you to use your hands to create useful things from wood. There are times when two pieces of wood need to be joined together. This article will teach you how to do this to keep your woodwork projects looking great.
First, remove any sharp edges from the wood pieces before you join them. Sharp corners can cause problems down the line. Now it's time to start glueing your boards together.
When working with hardwood, glue should be applied only to one side. For softwoods like cedar and pine, glue should be applied to both sides. Once you have applied the glue, press down on the boards until they are fully attached. Be sure to let the glue dry before you move on to the next step.
After you glue your boards together, drill holes at the joints where screws will be inserted. Depending on what type screw you choose, the size of these holes will depend on how big they are. If you are going to use a half-inch wood screw, you will need to drill at least 3/4 inch deep.
Once you've drilled your holes, you'll want to drive the screws through the joint and into the backside of the board. Be careful not to hit the front surface of the board, or else you'll ruin the finish. Be careful not to drive the screws too hard at the ends. This will prevent splitting the wood's end grain.
Once your project is complete, it's time to protect it against the elements. You can either seal the entire piece of furniture or cover the top. Either way, you'll want to use a product that will last for years to come. Examples include oil-based varnishes and polyurethanes, shellac, lacquer and others.
These products can generally be found in any home improvement shop. Make sure you get the right product for your job. Don't forget to keep in mind that some finishes are toxic. Wear protective gear whenever you are handling them.