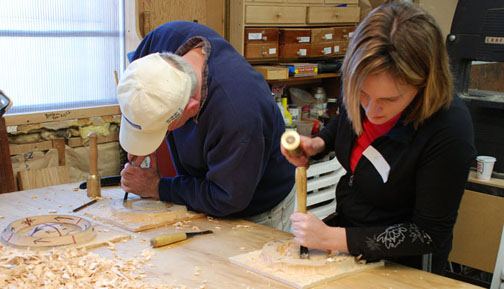
If you've ever wanted your own carvings, it's possible to follow along with a photo-trail. This is a great way of replicating a famous carver without spending time researching each style. After all, you want your eyes to be as realistic as possible, and you'll likely have a lot of fun doing it. Do not worry if your skills aren't up to par. There are many easy methods to achieve realistic-looking vision.
Lesson 4 - Carving hair
This tutorial will teach you how to create beautiful flowing hair for your animal carving. It will allow you to create a lifelike appearance and create an illusion of emotion. The video will show you how to create different textures and styles of hair. You can also learn how to use different curved tools to create the different levels of cut hair. Once you are comfortable with the basics, you can start to tackle the more complex parts of your face like the nose and eyeballs.
First, outline the eye cavity with a pencil. Next, draw straight lines that extend from the eyebrows to the eyelids. You can also draw small squiggles on the forehead to make it rounder. After that, you can use a whittling blade to round out the corners and the bottom lip.
Lesson 5: Carving crow's feet
Crow's feet is a common condition. You should learn what causes it. Repeated facial expressions like squinting can cause wrinkles. Crow's feet can be caused by repeated facial expressions, such as squinting. You should wear reading glasses or sunglasses if you have the tendency to get them. For crow’s feet prevention, you can use facial moisturizers.
Fine lines and wrinkles on the face make people appear older than their years. Thankfully, you can easily remove these lines to reveal a younger-looking complexion. Here are some useful tips:
Lesson 6 - Carving an Iris
For this lesson, children can look at the iris and ocellus in a mirror to see how they appear and feel. They can also draw their eye using observational drawings and the mirror. They can also look for white and different shades in the central black. After they've finished drawing, they can add color using different media to create depth illusions. Children can compare their eye drawings and see how they differ in color.
FAQ
Do I need to be a genius to succeed in woodworking?
No. Woodworking is not rocket science. To create stunning works of art, anyone can learn to use basic power tools.
How does a beginner woodworker earn money?
Many people are starting to learn how to build furniture because they want to start an online business. There are other ways to make money if you're just starting out building furniture than selling on Etsy. You could also sell at craft fairs, or other local events. For those who want to build their own furniture, you might offer workshops. Consider offering your services if you have previous experience as a builder or carpenter.
What type of wood should I choose?
Oak, maple, cherry and mahogany are the most common wood types used for woodworking. Each wood type has its own characteristics which affect the final product's appearance and feel. Oak is a darker wood and tends to be more durable than other types. Birch is light and soft, while mahogany can be heavier and more dense. There are two options: solid wood and veneers. Veneers are thin sheets of wood that are glued together to form a single layer.
What else should I know about woodworking in general?
It is easy to underestimate how much work it takes to make furniture. Finding the right type of wood is the most difficult aspect of this process. It can be hard to choose from the many types of wood that are available.
Another problem is the fact that not all wood has the same properties. Some woods will warp and others will split or crack. These are important considerations to make before you purchase wood.
How much should a woodworker charge per hour?
Hourly rates for professional woodworkers vary depending on many factors such as skill, experience, availability, geographical location, and other variables.
A skilled woodworker can expect an hourly rate of $20-50.
An hourly rate of $10 for a less skilled woodworker could be possible.
How can I keep my shop organized?
The first step toward keeping your workshop clean and organized is to set aside a designated area for storing tools. To keep your tools sharp and ready for work, keep them clean of dust and debris. Pegboard hooks can be used to hang tools and accessories.
What's the difference between a hobbyist and a professional woodworker?
Hobbyists love making things from wood while professionals are more concerned with the quality of their work. Hobbyists usually take pride in their creations and often share them with friends and family. Before they start working on a project, professionals will spend hours researching the designs. They will meticulously plan every detail of their work from choosing the right materials to finishing it.
Statistics
- Most woodworkers agree that lumber moisture needs to be under 10% for building furniture. (woodandshop.com)
- Woodworkers on the lower end of that spectrum, the bottom 10% to be exact, make roughly $24,000 a year, while the top 10% makes $108,000. (zippia.com)
- In 2014, there were just over 237,000 jobs for all woodworkers, with other wood product manufacturing employing 23 percent; wood kitchen cabinets and countertop manufacturing employing 21 percent. (theartcareerproject.com)
- If your lumber isn't as dry as you would like when you purchase it (over 22% in Glen Huey's opinion…probably over 10-15% in my opinion), then it's a good idea to let it acclimate to your workshop for a couple of weeks. (woodandshop.com)
External Links
How To
How to join hardwood without using nails
Woodworking is an enjoyable hobby. It is relaxing and enjoyable because you can create something useful with wood. There are times when two pieces of wood need to be joined together. This article will teach you how to do this to keep your woodwork projects looking great.
You will first need to trim the edges of your wood pieces before joining them. You don't want any sharp corners to cause problems later. Once you've done this, you're ready to start gluing your boards together.
If you're working with hardwood, you should only apply glue to one side. For softwoods like cedar and pine, glue should be applied to both sides. Once the glue has dried, press the boards together until they are fully adhered. Make sure you let the glue dry before moving on to the next step.
After you've glued your boards, you'll want to drill holes into the joints where you plan to insert screws. Depending on what type screw you choose, the size of these holes will depend on how big they are. For example, if you're going to use a 1/2-inch wood screw, then you should drill a hole that is at least 3/4 inches deep.
After drilling your holes, drive the screws into the board's backside. You should be careful not to touch the board's front surface. This could cause damage. Avoid hitting the screws' ends too often when driving screws. This will prevent the wood from splitting.
You'll need to protect your completed project from the elements. To do this, you can seal the entire furniture piece or just cover the top. You will want to choose a product that will be durable for many years. Examples include oil-based varnishes and polyurethanes, shellac, lacquer and others.
These products can generally be found in any home improvement shop. You should make sure you are getting the right type for the job. Also, remember that some finishes are toxic and should never be used indoors. Always wear protective gear when handling any of these finishes.