You've likely tried chip carving before and it's not an easy task. There are many styles and techniques you can use, but which one is the best? What tools do I need? This article will share my tricks and tips for carving chips and help you choose the right one for you. There are many key ingredients to successful chip carving, no matter how traditional your style.
Traditional
Chip carving is one of oldest forms of woodcarving. It requires a straight-edged knife but a skew-ground or offset blade knife can also be used. Chip carving involves making small triangular cuts in wood to create patterns. This art form developed over 1,000 years ago. It has been adapted in many other countries. Because of its widespread popularity, the designs were often so similar across nationalities that it was impossible to discern one from another.
As woodcarving became more widespread, the skills necessary to do the job were handed down from one generation to the next. Chip carving was used in Sweden to decorate furniture. Schools were eventually established to teach this art. Modern chip carvers benefit from centuries of experience and the skills of carvers. Through the generations, knowledge was passed from carver to apprentice to student. It's an ongoing process that lasts for a lifetime.
Free form
This DVD will teach you how to chip carve. Murray Taylor's DVD shows you how to make freeform and geometric carvings. This DVD is a great introductory project that provides lots of information. Both NTSC and English versions are available. You can also buy the DVD in widescreen or stereo. Artisan Media Ltd. is the owner of DVD. It is also available in MP4 format for Windows or Mac computers.

Triangles, circles and lines are the basic shapes of geometric chip carving. This technique can be combined with different styles and shapes to create endless possibilities. This type of chip carving is also known as free-form chip carving. You can make your chips look beautiful in any room, no matter whether they are a flower, a dragon or a tree. A free-form method of chip carving is a great way to incorporate several different techniques into one piece.
Techniques
Chip carving has been practiced for hundreds of years. There are many examples all over the world. On paddles used for ceremonial purposes and boats in the South Pacific Islands, one example of chip-carving is found. These carvings were most likely done using bits of bone and sea shells, but some people have reported using shark teeth as well. This book demonstrates how to use a variety of chip carving techniques to produce stunning designs.
If you're familiar with a few basic techniques, chip carving is very simple. First, you need to learn how to carve the fine triangular shape. This pattern can be understood and executed quickly. Simply carve several triangles and continue this process until you have carved the pattern. However, this does not mean that your chip carving has to be boring - by varying the triangles, you can create a range of wonderful patterns.
Tools
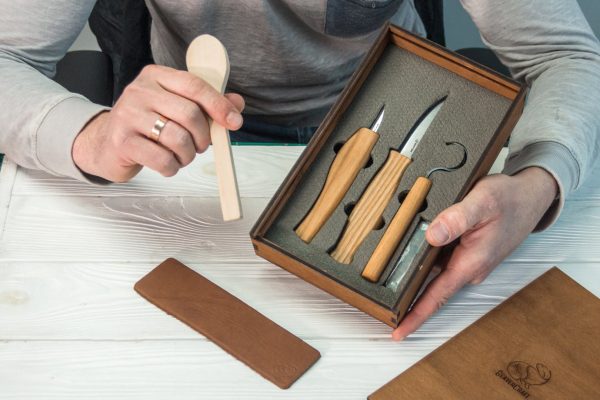
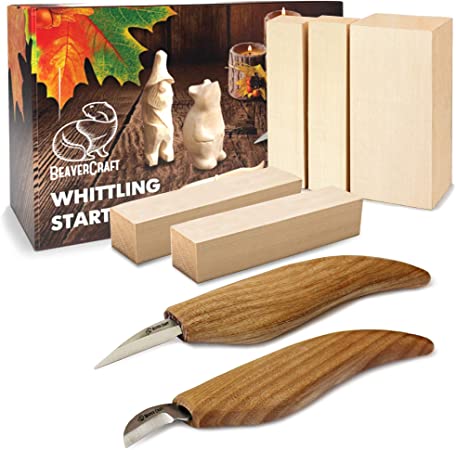
You can learn the basic steps of chip carving by attending a free online seminar from Lora S. Irish. She shows you how to use a variety of carving tools and materials, such as a chip, stab, and detail knife. Irish will also be demonstrating the different types and uses of wood carving tools. You can choose from the list below to purchase the right tool for your carving needs. You can use these tools to create simple shapes and designs, or work more intricately and make more intricate designs.
A chip carving knife uses special geometry. It measures about one and a half inches in length with a narrow, curving back edge. This makes it easy to make precise cuts. It is also important to choose a sharp, needle-sharp point so that the edges meet perfectly. Also made of stainless steel, chip carving knives come with a sharp point. A chip carving knife should be sharp enough to cut a sliver of wood.
Getting started
When getting started with chip carving, you must first learn about its methodology. The method you choose will depend on the type and purpose of your carving. You should still be familiar with some principles in order to make sure your work is as precise as possible. The method of chip carving involves cutting a fine pattern in the wood. Follow these steps for your first chip carving:
It is vital to sharpen your chip carving knife properly. The blade of the chip carving knife will have bevels on each side, indicating that it is a primary chip carving knife. The sharpening stone is shaped like a diamond and can produce efficient edges. Place it at a ten degree angle. The stone will simultaneously sharpen both the chip carving knife & chip carving tool.
FAQ
Where can I begin with woodworking
Learning how to build furniture is the best method. While you will need tools, mistakes are inevitable, but you will learn the ropes if you persevere.
Start by choosing a project you'd like to complete. You could make something as simple or complex as a box. Or you could build a whole entertainment center. Once you have chosen a project, locate a local woodworker who is skilled in this kind of work. Ask them for suggestions on the tools you will need and where to buy them. Maybe you can ask the person if they know of anyone who does this sort of work.
What amount of money do I need to get started with my business?
Since every project differs, it is impossible to give exact numbers. Consider these factors if you need to estimate the amount of money that you will require.
-
Materials cost
-
Tools and equipment
-
Time spent on the project
-
Your hourly rate
-
How much profit can you anticipate to make
-
Hire help
You might start small if you are just starting out. You will gain more experience and be able to tackle larger projects.
How much do hobbyists need to invest in starting a business?
A lot of capital is required to purchase the necessary supplies and tools if you want to start your own woodworking shop. You can start by purchasing a small table saw and drill press as well as a circular saw, circular saw, jigsaw and sanding machines. These items don't cost much so they won't break your budget.
How much should a woodworker charge per hour?
The hourly rate for a professional woodworker varies depending on many factors, including skill level, experience, availability, location, and other variables.
The average hourly rate for a skilled woodworker ranges from $20-$50 an hour.
A less skilled woodworker can charge as low at $10 an hour.
Where can you buy your woodworking materials?
There are many places you can get everything you need, and you don't have to go far. You could go to your local hardware shop or visit websites such as Amazon.com.
You might also consider flea markets and garage sale for any old furniture or other materials you could reuse.
Which woods are good to use for furniture-making?
Woods can be classified according to how hard they are. Softwoods can be pine, fir or cedar. Because they are resistant, they can be used for outdoor furniture. Hardwoods include oak, maple, mahogany, and teak. Because they can't weather outside, they're usually used indoors.
Can this be a way to make money?
Yes! In fact, many woodworkers already do. According to the U.S. Bureau of Labor Statistics (BLS), the median annual wage for woodworkers was $34,000 in May 2012. This is significantly higher than the national average, which is $31,000 per year.
Statistics
- Woodworkers on the lower end of that spectrum, the bottom 10% to be exact, make roughly $24,000 a year, while the top 10% makes $108,000. (zippia.com)
- Overall employment of woodworkers is projected to grow 8 percent from 2020 to 2030, about as fast as the average for all occupations. (bls.gov)
- Average lumber prices rose about 600 percent between April 2020 and May 2021. (familyhandyman.com)
- In 2014, there were just over 237,000 jobs for all woodworkers, with other wood product manufacturing employing 23 percent; wood kitchen cabinets and countertop manufacturing employing 21 percent. (theartcareerproject.com)
External Links
How To
How do I accurately measure wood?
We have several ways to measure wood. We use a digital ruler (a tool to measure distances), laser level (used for leveling your work surface), and bubble level (used for levelling your work surface).
A digital caliper has two jaws that open and close. One jaw holds a measured object and the other measures distances between the points. Digital calipers are great for measuring small distances, such as thicknesses of wood.
Laser levels emit an infrared laser beam that projects a straight line across the floor. The laser emits a red dot along the line. By looking down the line, you can see whether the surface is even or not. For larger surfaces, laser leveling is the best method of checking accuracy.
Bubble levels look similar to a compass. The device's center bubble is visible. As long as the bubble is centered, the device will tell you whether the surface is level or not. The bubble levels can be used to check the accuracy of smaller areas.