
Many woodworking beginners have the same struggles: lack confidence, patience, and poor work quality. These simple tips can make a big difference. Below are 15 key tips to help you woodwork with pallets. Each of them will improve your results. This is an example of how a powersaw can help. Some other simple tips are effective for woodworking pallets. For example, duct tape on the back of a piece of thin sandpaper will help you keep the workpiece off the bench surface when finishing.
15 tips for woodworking with pallets
These are the most important things to remember before you start pallet woodworking. First of all, keep in mind that this type of wood is rough, so you should use safety gear and a sturdy work surface. Wood clamps can be used to secure the pallet during cutting. Each tool has safety guidelines. Pallet wood should not be handled by your hands.
It can be hard to remove a pallet. Avoid getting stuck in a pile full of nails and other scraps. This will enable you to work quicker. Use thick gloves and safety glasses to protect your eyes. After disassembling a pallet, you must store the wood according to its size and color. The nails could stick out, making a huge hole in the wood.

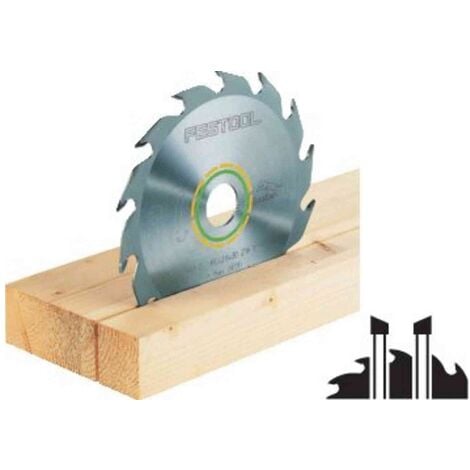
Power saws
You can choose from a variety of power saws if you're just getting started in woodworking. Some can be used for simple tasks, while others have more power and can be used to tackle more challenging projects. Each tool has its pros and cons. Before you buy one, you'll need to determine which type you require. There are two main types: the jigsaw and the table saw. You can use table saws to cut both wood and other materials.
Whether you're using a circular saw for a door frame or molding project, a portable saw is an essential tool in any toolbox. A portable saw makes it easy to cut cleanly without the fuss and hassle of a tablesaw. If you need to cut quickly and accurately, a powersaw is the best choice. Safety is the most important aspect of power saws. Learn how to properly care for your blades and what protective gear you should use.
Finishing: Workpieces should not touch the bench.
When finishing, keep workpieces away from the workbench surface. Consider removing workpieces from the workbench when finishing woodwork. A shiny-film finish workbench can cause workpieces and other materials to slide on the surface. This may lead to cracking when hammered. Danish Oil or boiled oil linseed oil are good options. Windows can shine light onto a wall that holds up a workbench.
Tape thin sandpaper to the back with duct tape
There are many types of sandpaper available. Some are cloth-backed, while others have PET film or fiber backings. Backings can be attached to the paper, or they can create their own support structure. For irregular surfaces, a flexible backing works best. A rigid backing may cause scratches and rips, which can lead to a less polished finish.
For a quick and cheap way to make your Sandpaper flexible, use old ducttape on the back. These strips work well for sanding staffs, spears and dowels.
FAQ
How do I organize my shop?
First, make sure you have a designated space for tools storage. Keep your tools away from dust and debris, so they stay sharp and ready to work. Pegboard hooks can be used to hang tools and accessories.
How do you calculate woodworking prices?
The most important thing to remember when calculating costs for any project is to keep them as low as possible. Make sure you're getting the best prices on materials. It's also worth taking into account all the other factors that may affect the cost of your projects, such as time, skill level, and experience. Check out our guide on the average cost of common DIY projects to get an idea of how much you can spend on woodwork projects.
How often do I need to buy new supplies
You may have to replace certain tools. If you are using hand tools, you will need to sharpen them frequently. For power tools, replacement parts will be required frequently. Try spreading your purchases over a few months so you don't buy too many at once.
Are there any tips for starting a woodworking enterprise?
It takes a lot of effort to start a woodworking business. You won't mind working hard if your hobby is something you love. You'll enjoy the challenge and rewards of owning your own business.
Remember that you may encounter unexpected problems when starting a new venture. You may run out of money suddenly. Or maybe you'll find that customers aren't willing to pay as much as you'd hoped. Preparedness is key to survival in such situations.
A good tip is to open a separate bank account for your business. This will ensure that you always know how much money has come in.
How long does it take to finish a piece of furniture?
It depends on the size of the piece of furniture. Boxes and picture frames are small projects that can be completed in one day. Larger projects such as tables and desks can take several days to complete. It takes time and effort to properly stain the wood.
Statistics
- Average lumber prices rose about 600 percent between April 2020 and May 2021. (familyhandyman.com)
- Most woodworkers agree that lumber moisture needs to be under 10% for building furniture. (woodandshop.com)
- Overall employment of woodworkers is projected to grow 8 percent from 2020 to 2030, about as fast as the average for all occupations. (bls.gov)
- Woodworkers on the lower end of that spectrum, the bottom 10% to be exact, make roughly $24,000 a year, while the top 10% makes $108,000. (zippia.com)
External Links
How To
How to join hardwood without using nails
Many people love woodworking. Woodworking is a relaxing hobby that allows you to use your hands to create useful things from wood. However, there are times when you want to join two pieces of wood together without having to use nails. This article will show you how to do it to make your woodwork projects look great.
Before you can join the wood pieces together, you need to remove any rough edges. Do not leave any sharp corners as they could cause problems down in the future. Now you can start gluing the boards together.
If you're working with hardwood, you should only apply glue to one side. Use glue on both the sides for softwoods, such as cedar or pine. Once you have applied the glue, press down on the boards until they are fully attached. Before you proceed to the next step, be sure to let the glue dry completely.
Once you've glued your boards together you will need to drill holes in the joints to accommodate screws. You can choose the type of screw to determine the size of your holes. If you are going to use a half-inch wood screw, you will need to drill at least 3/4 inch deep.
After drilling your holes, drive the screws into the board's backside. Don't hit the board's surface. You could damage the finish. Be careful not to drive the screws too hard at the ends. This will prevent the wood from splitting.
You'll need to protect your completed project from the elements. You can either seal the entire piece of furniture or cover the top. You will want to choose a product that will be durable for many years. There are many options: oil-based varnishes; polyurethane; shellac; lacquer.
You can find these products at most home improvement stores. Be sure to choose the right one for your project. Keep in mind that certain finishes can be toxic and should not be used indoors. Wear protective gear whenever you are handling them.